Using Git Cli - The Basics
Git is one of the Leading Revision Control Systems nowadays. But Using it’s CLI tool is sometimes a Big Headache. Read On to get going with basics of Git’s CLI tool.
What is a Revision Control System?
A system which helps you keep track of the changes you do in a piece of software and if something goes wrong, lets you go back to the previous working state is roughly what is called a Revision Control System. The system helps you keep track of what changes you did along with the differences between two snapshots of a certain file. A Snapshot is a position in the timeline of a project which you choose to save.
Think of all this like a Timeline. A single Unidirectional flow in time which you keep memories of. Your Memories are the Snapshots and the Timeline Resembles the development and changes in your project. Now Unlike Real World, For your project You are the Creator. You can control if you want to make changes and weather you want to go back to a position where the changes you made didn’t exist. And if you are working on a Smaller project which runs between only a couple hundred lines of codes, You will absolutely remember what changes you did and where. But as you gain the neccessary experience, You start working on Big Projects spanning between thousands of lines of codes. The changes you make will be forgotten easily and will vanish between the un-ending sea of thounsands of words which you use to construct a masterpiece.
Here’s where (ver)/(revi)sion Control Systems come in Action. Every change you make is Recorded. Easier for you to manage. A worry lesser to care about. Forget all you want, But you always have a place to make you remember what you forgot. Thats the power of these Systems.
Why Git though?
Git, for One, Is a upgraded VCS(Version Control System). It is a Distributed VCS. What it means is, For everybody working on a Certain Project, All of the Contributers have a Copy of the Original CodeBase and all of the changes recorded by the VCS. This means that all the contributers can have a copy to which they can make changes, which at the end of the day will be Combined into One single Updated CodeBase.
You initialize the repo, then you go on capturing screenshots of the changes which are called “commits”. We can go back to the state of the file which was captured at a commit. Git also has a Branching Model. Continuing the above example of a Timeline, Using the Branching Model, We can have Branches of the timeline Totally Independent of each other, but deriving from the Original One. You can make separate changes which wont be reflected in the Original Timeline and when you think you are ready to accept the change you merge it in the Original Timeline. You can create branch of a branch and so on. You Get the Idea.

Local and Remote Repositories.
Repositories or Repos are like a folder containing all the files of your project, But, They contain the metadata and the data of changes done to the files. They are the Warehouse from where you can manage all the project files.
Remote Repos are the server based repos all of the contributers can access. They are the centralized Folders on, a server or a place where anybody with permissions can access it.
Local Repos are the Copies of the Remote Repos which a single contributor can make changes to. These changes are then “pushed” to the Remote Repos to be “merged” to the main CodeBase.
Lets Git
Now there are two possible usage cases for Git.
- You have a Project you Want Git to track. or
- You are starting a Fresh Project and want Git to Track it.
Whatever your usage case is it’s easy to integrate Git.
Installation
To Install Git on Your System, Visit the Download Page.
For Linux Here,
For Mac’s OS X Here and
For Windows we need a bit of extra setup.
- Download Git for Windows from Here.
- Run the Installer and install the program with default installation Path or if you want to install it elsewhere just remember where you install it. It will be
C:\Program Files\Git. - Now after installation open the file explorer and navigate to the folder where you installed Git.
- Follow The Steps written by @abizern Here. Just keep in mind that set the PATH to (your\installation\path\cmd) and (your\installation\path\bin)
- Now you can successfully Use Git in
cmd.
Confirm Installation
Checking Version of the Installed Program is a Nice way to check weather it is installed correctly.
Fire up your Terminal, Command Prompt or Powershell and run the following Command.
$ git --version
git version 2.26.2
You would probably get a higher version if you are doing this in the future of the post being written.
Lets make a Local Repo.
You can initiate a Git Repo locally by doing git init in an folder you want to track. For the sake of explaination, i will make an empty folder, initiate a repo in it(crazy how that adds up to “init”) and build it.
$ mkdir repo_folder
$ cd repo_folder/
$ pwd
/storage/emulated/0/repo_folder
$ git init
Initialized empty Git repository in /storage/emulated/0/repo_folder/.git/
We have initiated the Git repository in the folder. Now all git commands will work only in the folder where we have a git repo. We get a .git folder which is hidden, but running ls -al will show it. the ‘a’ flag shows all files and folders even if they are hidden and the ‘l’ flag shows them in a list view with some extra data.
The .git folder is where all the tracking goes on. We won’t go in much depth about it here, but be sure not to make changes to it.
Now suppose we get a folder but are not sure that it has a repo or not, to check, run the git status command.
If you are in a repo you get the following message. The command was ran in the newly created repo.
$ git status
On branch master

No commits yet

nothing to commit (create/copy files and use "git add" to track)
The message is really descriptive as is. Now lets run the command in a folder with no repo.
$ git status
fatal: not a git repository (or any parent up to mount point /storage)
Stopping at filesystem boundary (GIT_DISCOVERY_ACROSS_FILESYSTEM not set).
We get an error as expected. Now lets head back to our repo.
Configuration
Lets Configure Git with our identity. To do so we will run git config.
git config --global user.name "<your name>"
git config --global user.email "<your email>"
to check what you have set the values to run the same commands without the last argument i.e, without your name and/or email.
git config --global user.name
<your name>
git config --global user.email
<your email>
Commits
As our folder is empty, there’s nothing for git to track. I will make 2 text files and a folder in the repo folder.
$ touch testfile1.txt testfile2.txt
$ mkdir testfolder
$ tree
.
├── testfile1.txt
├── testfile2.txt
└── testfolder
We got something for Git to track, but, Git still wont track them. And to make git track the changes in them we need to tell git to track their changes. To do that, we need to add the files to the index of Git. We do that by using command git add. So we will add the files we made above to the git index. If you are on an existing project you need to start from here to make Git track it. Also if you want to check which files arent tracked, you can run the git status command and it will present you with untracked files but not empty folders.
$ git status
On branch master

No commits yet

Untracked files:
  (use "git add <file>..." to include in what will be committed)
        testfile1.txt
        testfile2.txt

nothing added to commit but untracked files present (use "git add" to track)
$ git add testfile1.txt testfile2.txt
it wont give you a output just yet but after you run git status once again, you get,
$ git status                                      On branch master

No commits yet
Changes to be committed:
  (use "git rm --cached <file>..." to unstage)
        new file:   testfile1.txt
        new file:   testfile2.txt
Notice, that we did not add the folder yet. If you have a big project to import you can use the * wildcard so that it imports everything, but it isn’t probably a good idea, more on it later.
Now we can capture snapshots of the files. And to do that we perform something thats known as doing commits. Run git commit <filename> for doing that. each commit has a message associated to it to describe what was changed. this message is given by the commiter which in this case will be you. We have setup the identity for this above using git config.
$ git commit testfile1.txt
hint: Waiting for your editor to close the fi[master (root-commit) 0f4a937] added testfile1.txt for git to track
 1 file changed, 0 insertions(+), 0 deletions(-)
 create mode 100644 testfile1.txt
Now if you are in an environment without an text editor or dont know how to supposedly use one. use the -m flag for git so that git takes the commit message from the terminal itself.
$ git commit testfile2.txt -m "added testfile2.txt using -m flag"
[master cf8de2b] added testfile2.txt using -m flag
 1 file changed, 0 insertions(+), 0 deletions(-)
 create mode 100644 testfile2.txt
so we have successfully commited the changes for adding the files to the index for git to track them. This was our first snapshot. next i will add some data to these files as currently there is nothing in them.
$ echo "Hello World!" >> testfile1.txtas soon as you do this git will find that something is changed. this will be reflected in the status.
$ git status
On branch master
Changes not staged for commit:
  (use "git add <file>..." to update what will be committed)
  (use "git restore <file>..." to discard changes in working directory)
        modified:   testfile1.txt

no changes added to commit (use "git add" and/or "git commit -a")
Git gives you an option to restore the changes and travel back to the state of file that was snapshotted earlier. But we won’t do that now. What we will do is check the difference between current state and the last state. we will do that by using the git diff command.
just running git diff will show you the difference between last commit and the current state of all files. if you are on Termux, this will open the difference in vi editor, so just type q on the keyboard.
now we can create a second snapshot by commiting again.
$ git commit testfile1.txt
[master aaf538f] second commit
 1 file changed, 1 insertion(+)
Remember that a git repo is nothing less than a folder with different index so you can move, add and delete files to them. lets move the test file2.txt to the folder we created earlier. We use the git mv command for this instead of the usual mv.
$ git mv testfile2.txt testfolder/              $ git status
On branch master                                Changes to be committed:
  (use "git restore --staged <file>..." to unstage)
        renamed:    testfile2.txt -> testfolder/testfile2.txt
Yes, we need to make a commit for this too. But now the file is not in the root position of repo so we will reference to it by its relative path.
$ git commit testfolder/testfile2.txt -m "moved to folder"
[master cf4fe87] moved to folder
 1 file changed, 0 insertions(+), 0 deletions(-)
 create mode 100644 testfolder/testfile2.txt
We can remove a file too. We will use the git rm command to do so.
$ git rm testfile1.txt
rm 'testfile1.txt'
If you run the git status command you will find that both the files are deleted.
$ git status
On branch master
Changes to be committed:
  (use "git restore --staged <file>..." to unstage)
        deleted:    testfile1.txt
        deleted:    testfile2.txt
This is because we did not add the testfolder to track. Lets do that and then commit all the changes for once.
$ git commit --all -m "all done"
[master 751c5b9] all done
 2 files changed, 1 deletion(-)
 delete mode 100644 testfile1.txt
 delete mode 100644 testfile2.txt
Yes, the --all flag commits the changes to all changed files.
Local Repo Training Done
That was all about local repos, Now we will make a remote repo on Github and upload our commits there.
- Head over to Github
- Login to your account or make one.
- Now we will create an Empty remote repo that will be our center hub. This repo can be cloned by anyone in the world(if you permit to do so), and can be modified but changes will only be reflected in the remote repo only if they do something thats called push. But this can only be done by someone having permission to do so. On and empty repo only the creator has this permission.
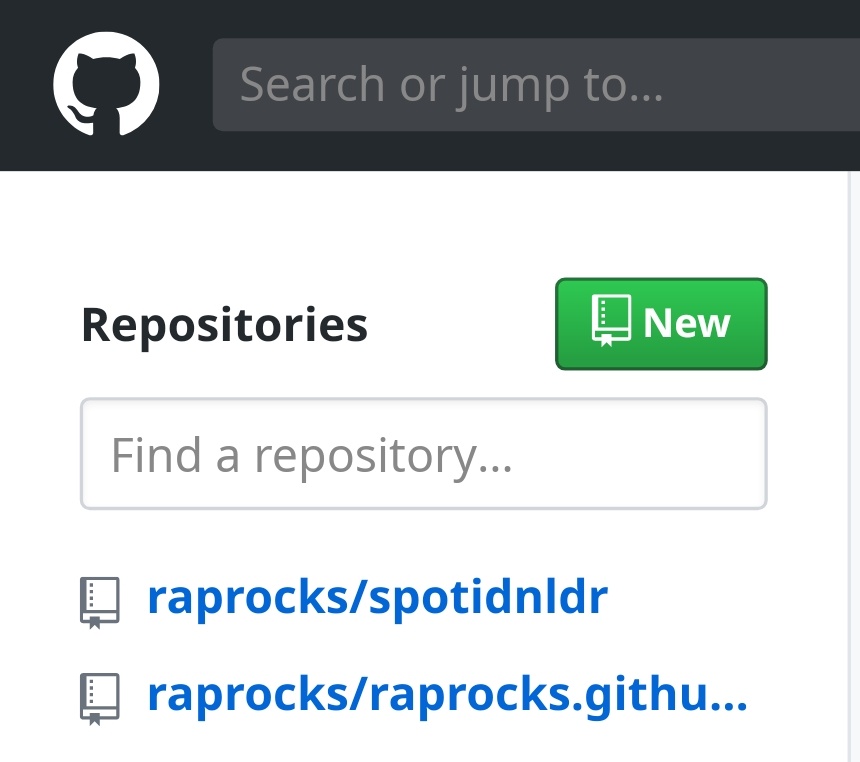
So to create an empty repo we click on the New Button.
- Add a repo name. It must be unique so that other people’s repositories don’t overlap. Add a description if you want to. Keep it public or private, you choose. After doing all this click on the create repository button[The Big Green One].
- Congrats you have made a Remote repo.
Connecting Remote repo to Local repo
- Head back to your terminal and change your working directory to the local repo folder which you want to connect.
- now to connect your local repo to remote repo we run the
git remotecommand. You can copy the command shown on the github page of your newly created repo. First lets check weather any url is set. Just run thegit remotecommand without any arguments.
$ git remoteNo output is what we want, and that is what we get.
- Now let us connect the remote repo
$ git remote add origin https://github.com/raprocks/repo_folder.gitStill no output, but, let us check the remote urls once again
$ git remote
origin
we got origin, but to check url it is connected to run git remote get-url <name>
$ git remote get-url origin
https://github.com/raprocks/repo_folder.git
now the connection is complete.So lets Push our code to remote repo.
$ git push -u origin master
Username for 'https://github.com': raprocksPassword for 'https://raprocks@github.com':
so if you enter your github password it wont work.To upload our code to the remote repo we need a token from github. So lets get that superfast.
Get Token to Push
- Head to This link.
- Click on Generate New Token.
- put a note to remember what this is for.
- Select repo in scopes as we need just thta yet.
- You will see a alphanumeric key. Copy that and store it in a safe place. You wont get another one or ever see this one on github again.
- Use this as a password for the earlier request.
$ git push -u origin master
Username for 'https://github.com': raprocks
Password for 'https://raprocks@github.com':
Enumerating objects: 13, done.
Counting objects: 100% (13/13), done.
Delta compression using up to 8 threads
Compressing objects: 100% (8/8), done.          Writing objects: 100% (13/13), 1.16 KiB | 593.00 KiB/s, done.
Total 13 (delta 1), reused 0 (delta 0), pack-reused 0                                           remote: Resolving deltas: 100% (1/1), done.
To https://github.com/raprocks/repo_folder.git
 * [new branch]      master -> master
 nBranch 'master' set up to track remote branch 'master' from 'origin'.
It pushes the code and commits to the remote repo. You can check this on Github. From now on you dont need to do the whole git push -u origin master, You can just do git push and it will work just fine.
Use what you learnt
So we learnt
- How to make a Local Repo
- How to add files to track and issue commits
- Make a Remote Repo
- Push our commits to the Remote Repo