Termux • Lets-Begin
So You want to learn coding, but don’t know where to start. And above all of this you are in a bigger problem, You don’t have a personal computer to code on. Dont Worry is what I will say to you. Until you got your Ambition to do something you can do it in any Conditions possible.
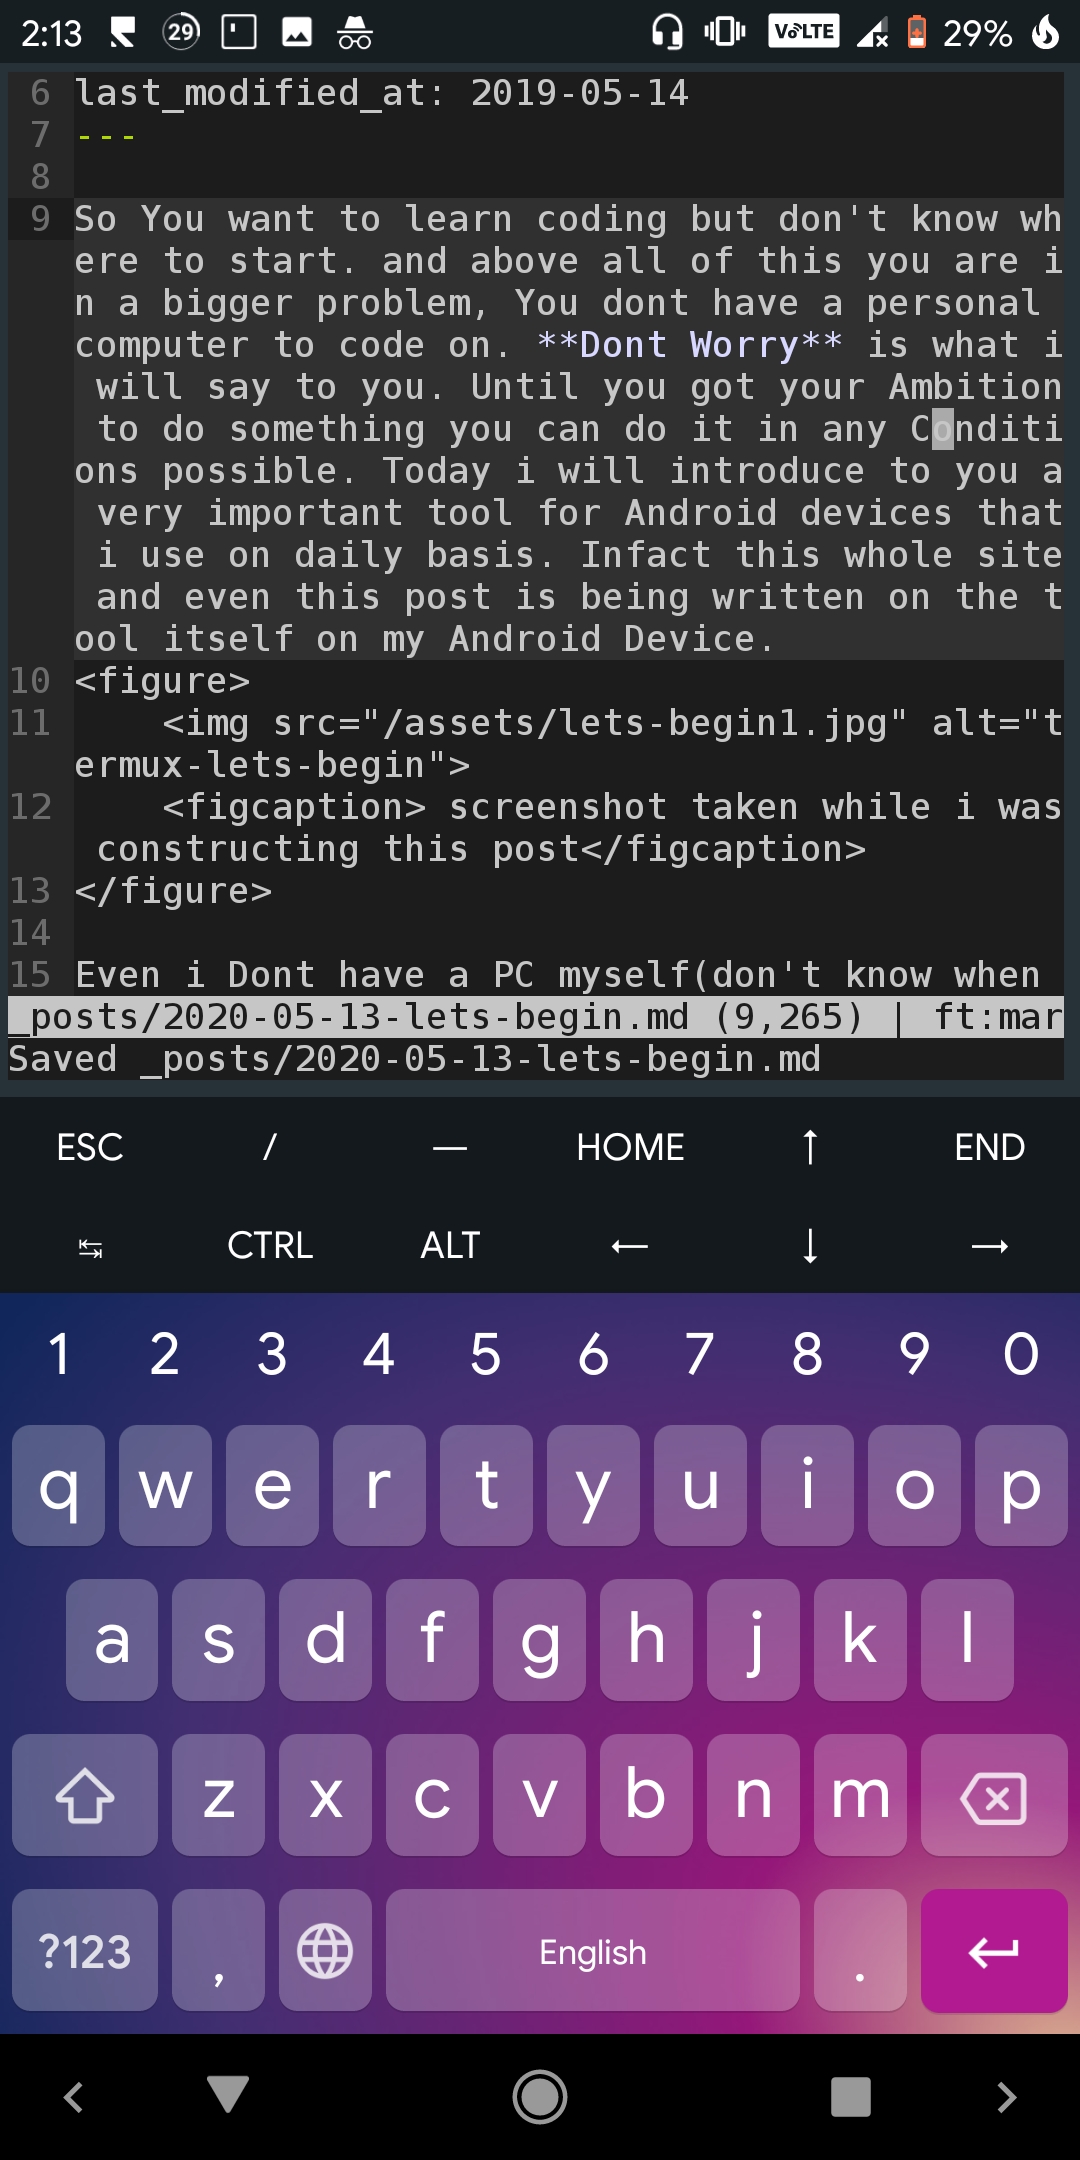
Today I will introduce to you a very important tool for Android devices that I use on a daily basis. In fact, this whole site and even this post is being written on the tool itself on my Android Device.
Even I Don’t have a PC myself (don’t know when you are reading this though. Check [about] (/about)), So, primarily I am working on my mobile. Obviously I have to compensate, some things. Like I don’t get to use a fully fledged IDE for coding and stuff But my phone does the things. So to give you an overview what we are going to do, as you read and follow along, is convert your phone into a workable setup for basic functions like for a beginner friendly tasks.
Termux
Termux is a Terminal Emulator and Linux Environment. As per the description on Google Play Store
Termux combines powerful terminal emulation with an extensive Linux package collection.
And this is True. The packages available on termux are really high in number. I’m yet to fully explore this but the most useful packages are here. You name it
- Python(CPython)
- Ruby
- Nodejs
- clang for compiling C/C++/objective-C code
- even the latest julia is here.
- and many more…
To get a full list you can visit the Termux Package Repo.
Termux’s default terminal is bash. Hence if you are a total beginner, you also get to learn the workings of Linux itself as the commands in Termux are mostly same as that in the terminals on desktop Linux.
Installation
There are 2 ways to Install Termux. The most simple way will be visiting the Google Play Store and download it, but the alternative from FDroid has its own advantages of being Free.
From The Google Play Store.
- You Can simply Follow the link Here to install the app.
- If you need to interact with your phones features like starting the flashlight, you will need to install a separate app named Termux:API.
- If you want to Stylize the Terminal you will need to install the Termux:Styling app. It will cost you money so think before you buy.
From F-Droid
F-Droid is a Play Store alternative for Free and Open Source Softwares. It is Completely Safe. And morever it is Free. So every app on here is free because it is open source. Hence you can even check the downloaded apps integrity by comparing the PGP keys.
- I will Recommend you to download the FDroid Client(the link is clickable so it will start to download) because it will be easier to track the updates and installation of the apps. But you are free to download the Apks standalone by following instruction down below.
- To download Termux visit Here. Scroll down to find the download button for the latest version and download The Apk.
- Termux:API can be downloaded here.
- Termux:Styling can be downloaded here following the same instruction.
- The downloaded Apks should be installed and just opening them in file manager should suffice and you will be treated by the instructions. Just follow them and you will be good to go.
So now we have installed all the apps required. Just double check that you see a Termux Icon and You are Done. The other 2 apps dont have a launcher icon as they act like plugins to the main apps so dont be alarmed if you dont see their icons.
Initialization
Just Open Termux and you will be greeted by a Installing message. Just let it finish and you will see a message on the screen. Now what you see is the most basic terminal window without any customization. Lets see what you have here
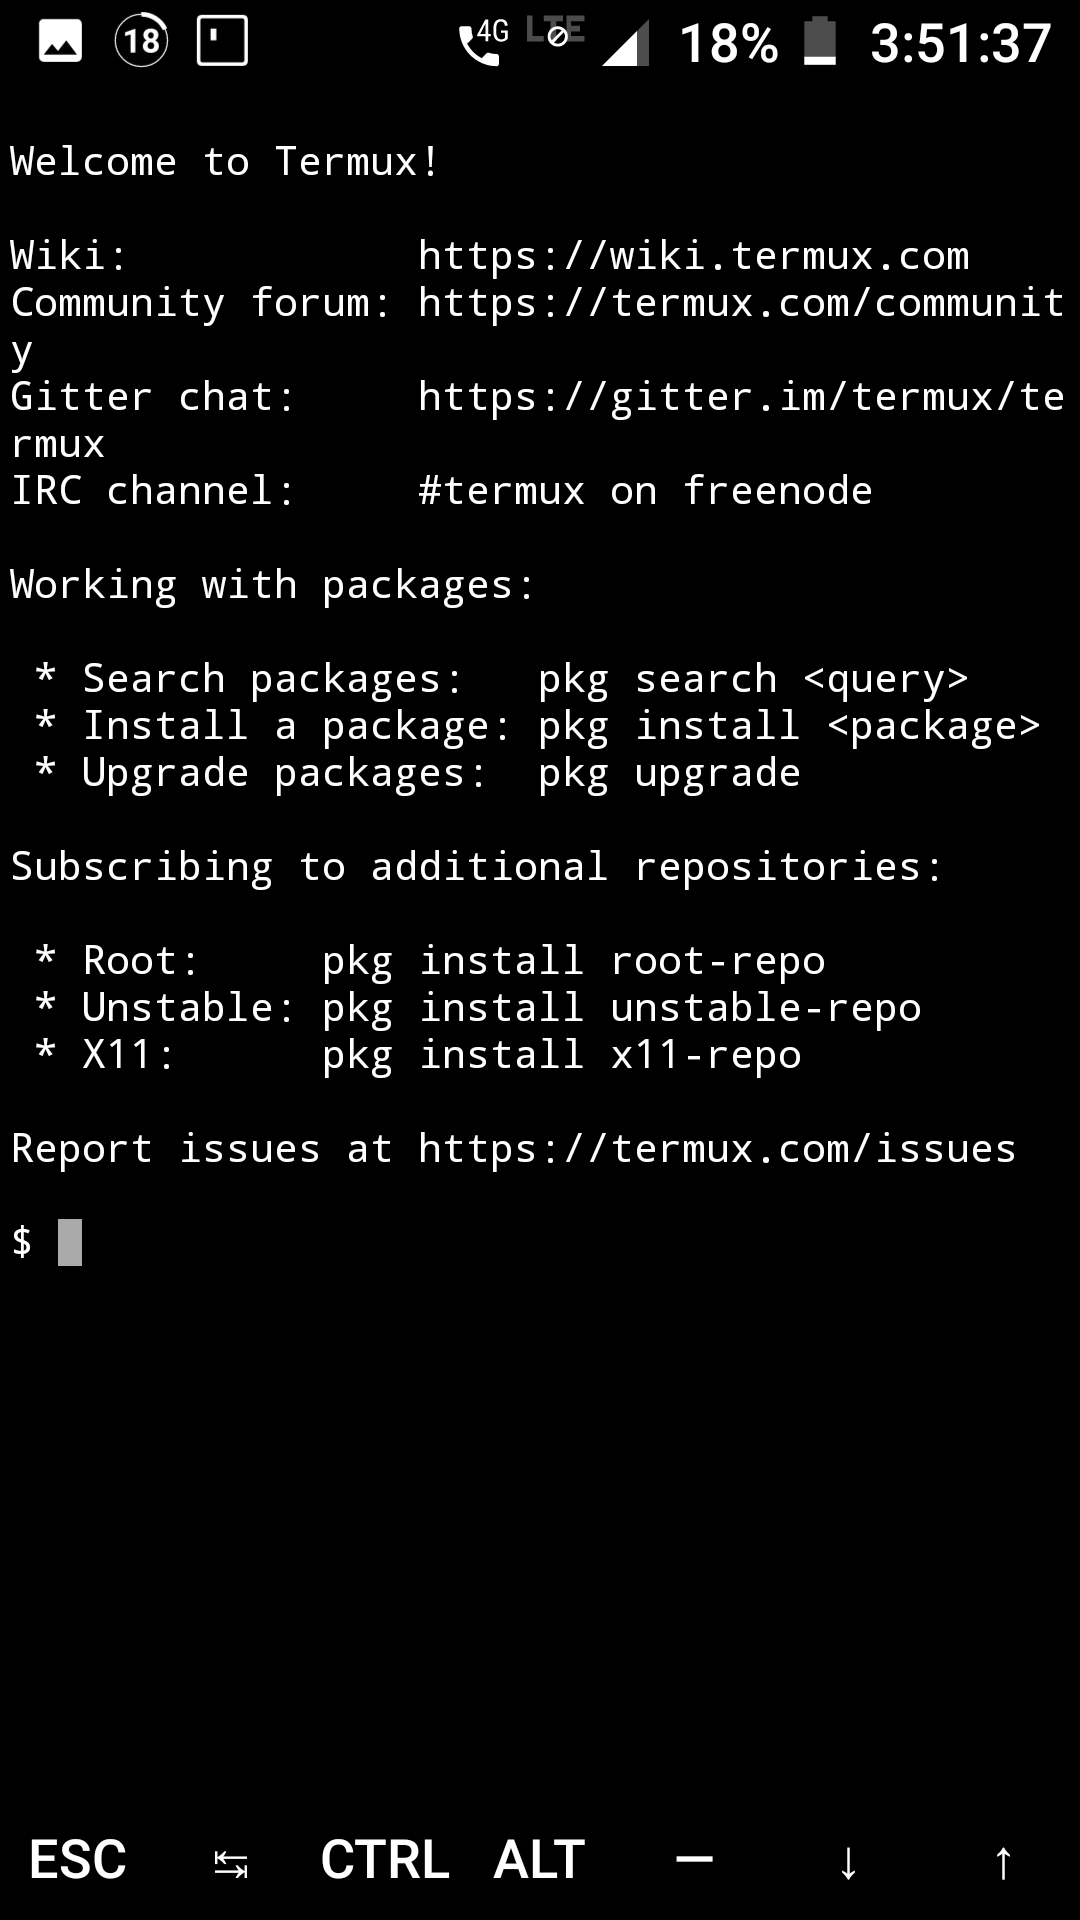
As you can see, we have a bunch of keys like the Ctrl, Alt, Tab and the Esc button. We will customize and add to them later on in this post. These are very important keys and we need them during operations done on the terminal.
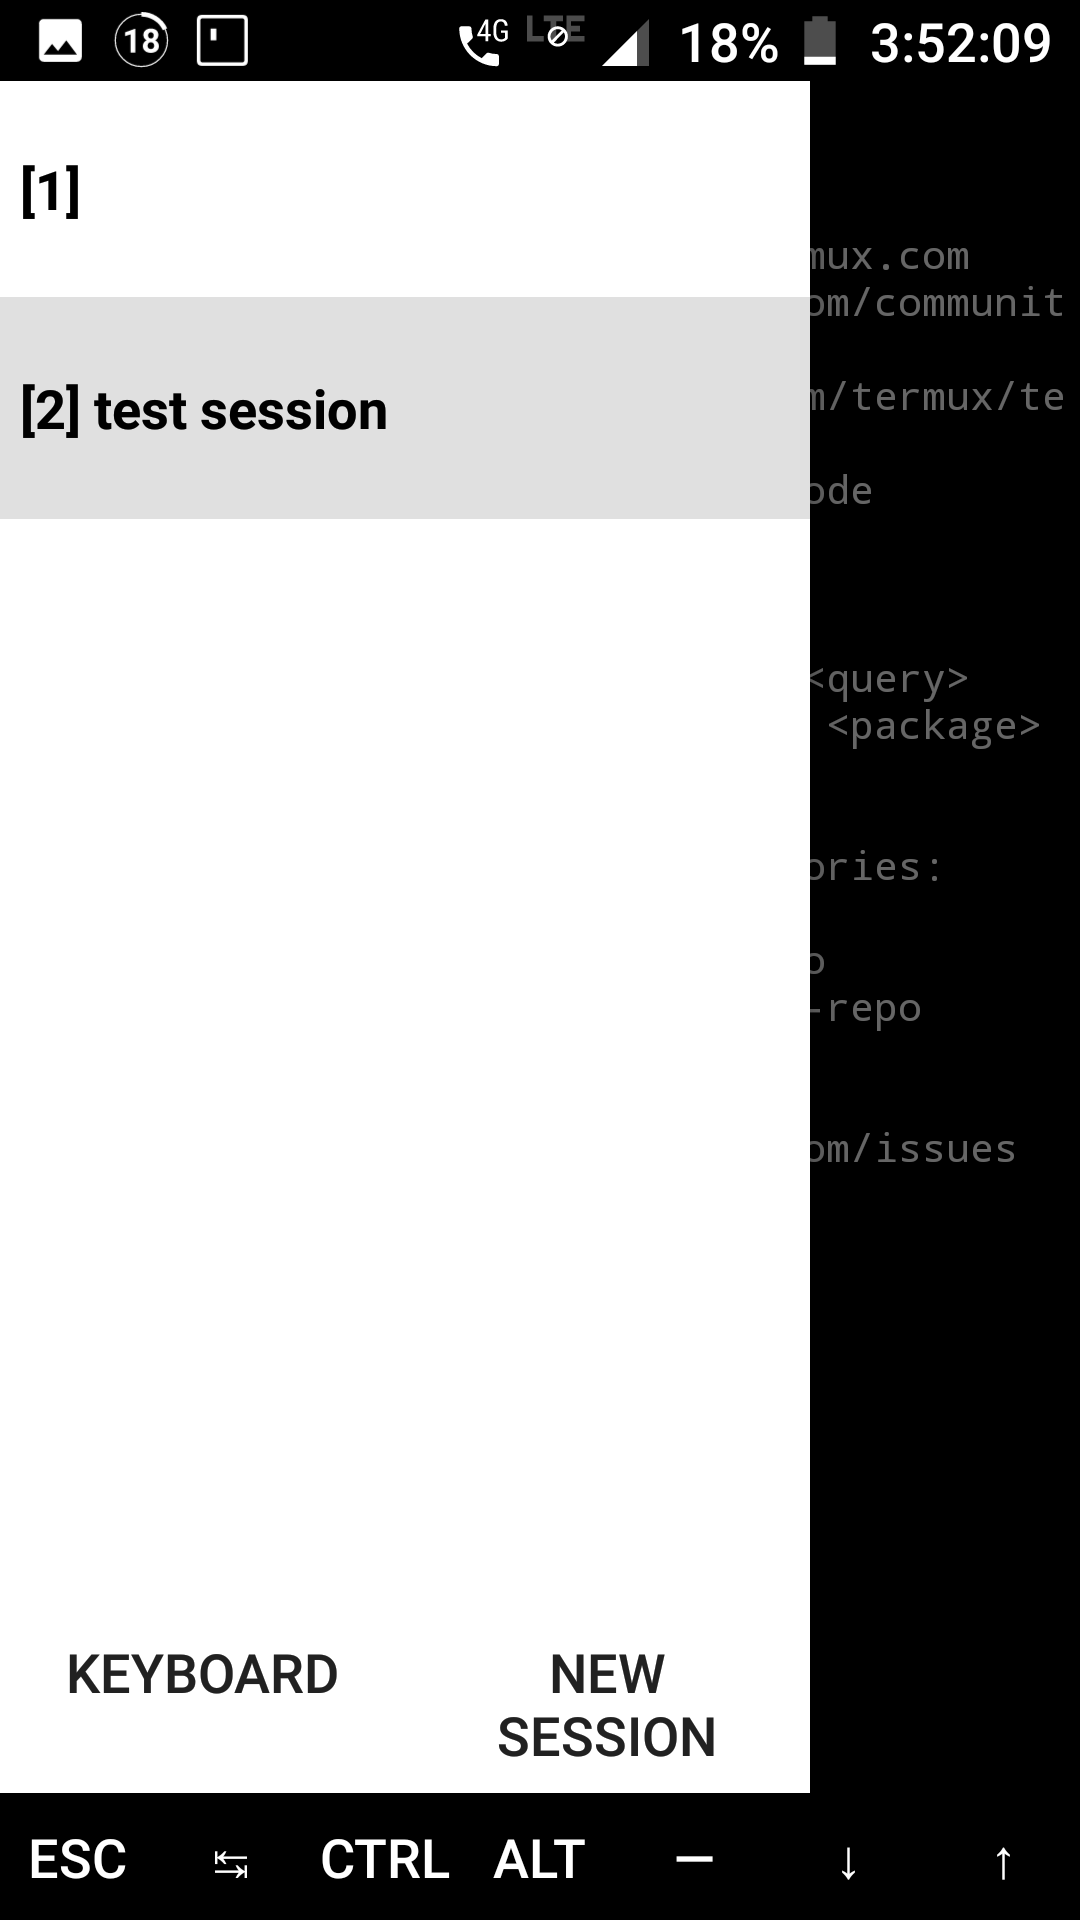
If you swipe from the left edge of the screen towards the right side you will see the Keyboard and New Session buttons
As the name suggests the Keyboard button is used to turn the input from the keyboard on and off by simply vanishing the keyboard form the screen and making it appear. This is helpful when tapping on the screen wont make the keyboard appear for some reason.
The New Session button is used to, Create New Sessions, of the terminal which are totally independantly functioning. This is useful to edit multiple files on the go instead of closing and reopening or to run an instance of a server in the background. You can rename the sessions to make them more identifiable.
Sessions

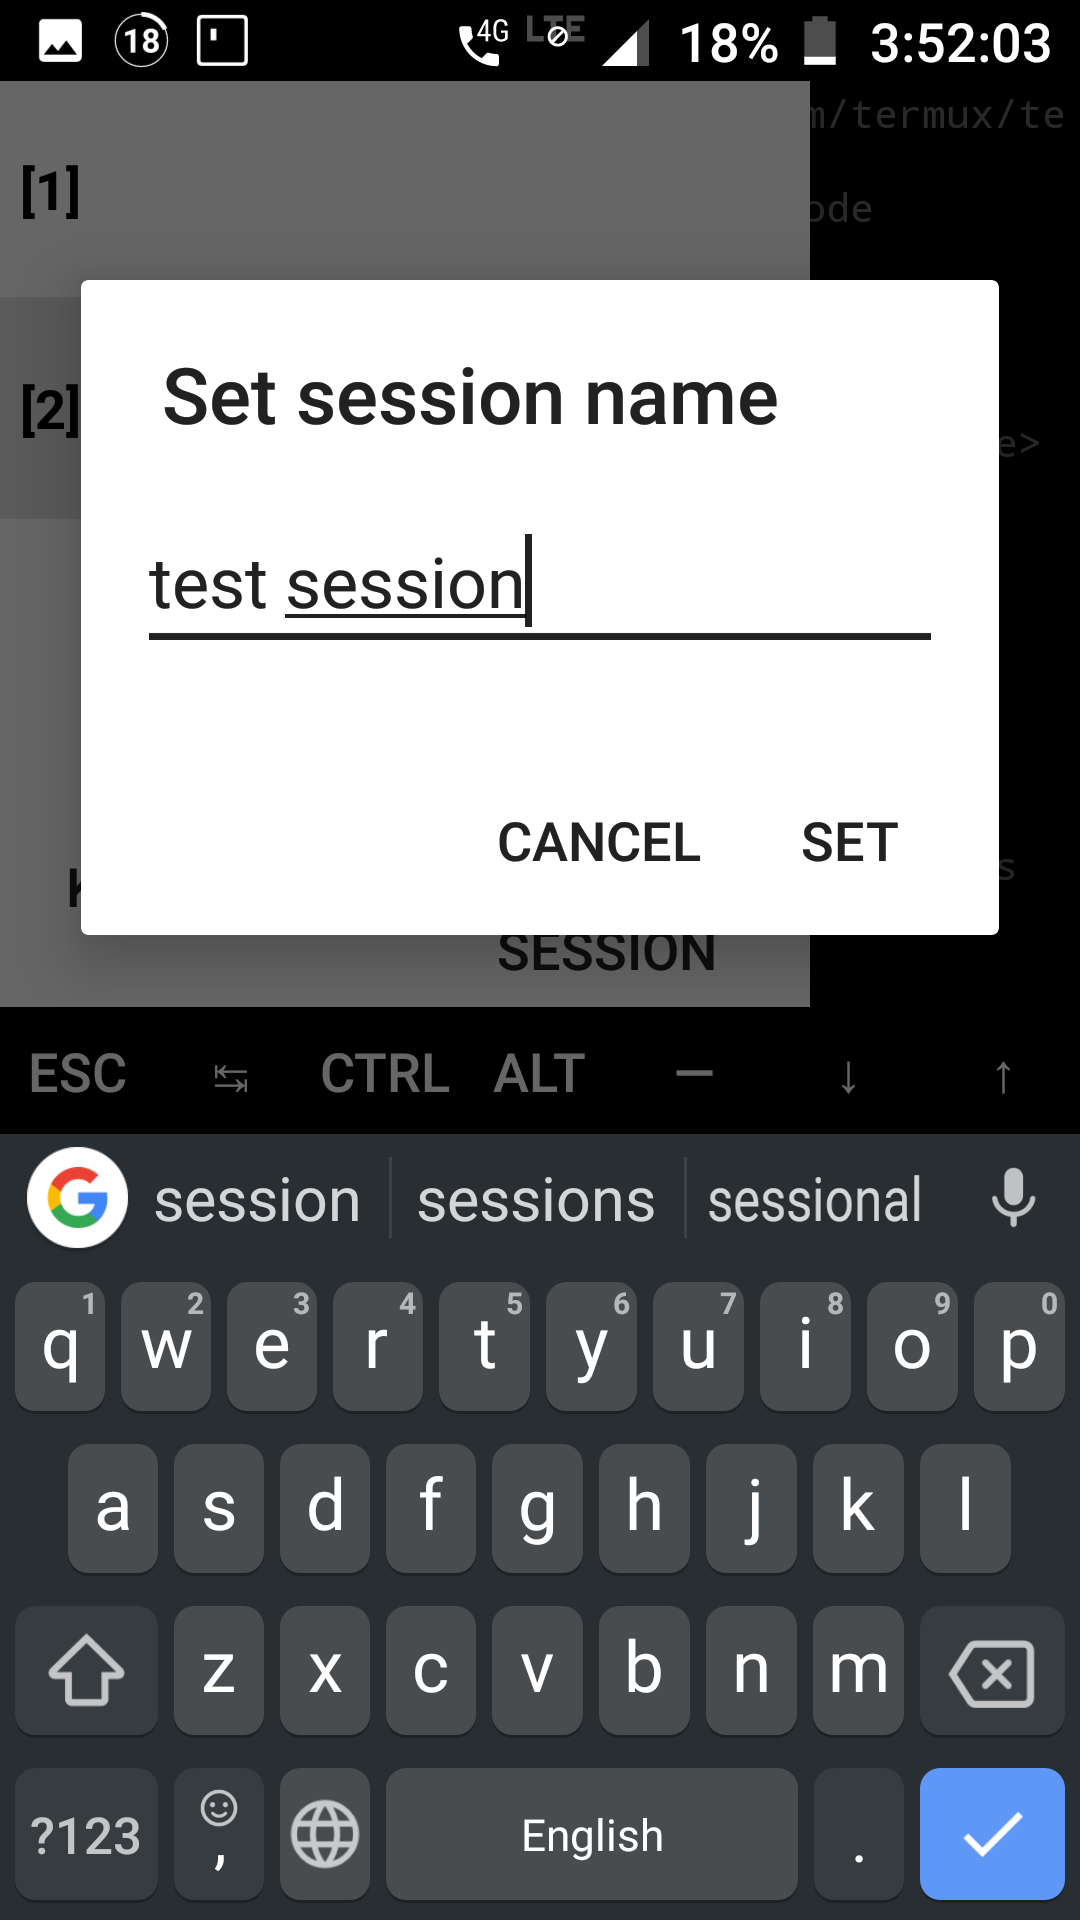
- To create a new session just tap on the New Session Button. To rename the session hold on the Session you want to rename. This will open a dialog box for you to enter the new name of the session. Here i created a New session(number 2) and will rename it.
- It is renamed to “test session” and we can switch between sessions by tapping on them.
Adding Additional Keys
To add additional keys to the termux screen like Arrow keys we need to add them in the termux.properties file in ~/.termux/ folder. And to do that we will use the echo command to push a string to the file.
echo "extra-keys = [['ESC','/','-','HOME','UP','END'],['TAB','CTRL','ALT','LEFT','DOWN','RIGHT']]" >> ~/.termux/termux.properties
you can customize and experiment with the positioning of these keys by moving their position in the command and replacing them with others from the list Here
also as you may have noticed till now that your keyboard is not giving you any suggestions and the auto-complete is not working so to use these features you need to swipe the buttons on the screen (the button list above the keyboard ) towards left. you will see a text box and there you have it, all your keyboard features have come back.
Installing Packages
To Install Packages in a linux system you need a program which is called package manager. Ubuntu has apt(aptitude package manager) as its package manager, debian has dpkg(debian package management system), pacman for archlinux, yum for RedHat and many more. Hence Termux has its own named pkg and alternatively it also has apt & apt-get, morever if you have *.deb packages you also have dpkg at your disposal. pkg is a wrapper for apt meaning it is a simple to use solution but in the background it works like apt.so lets run the pkg command once and see what we get.
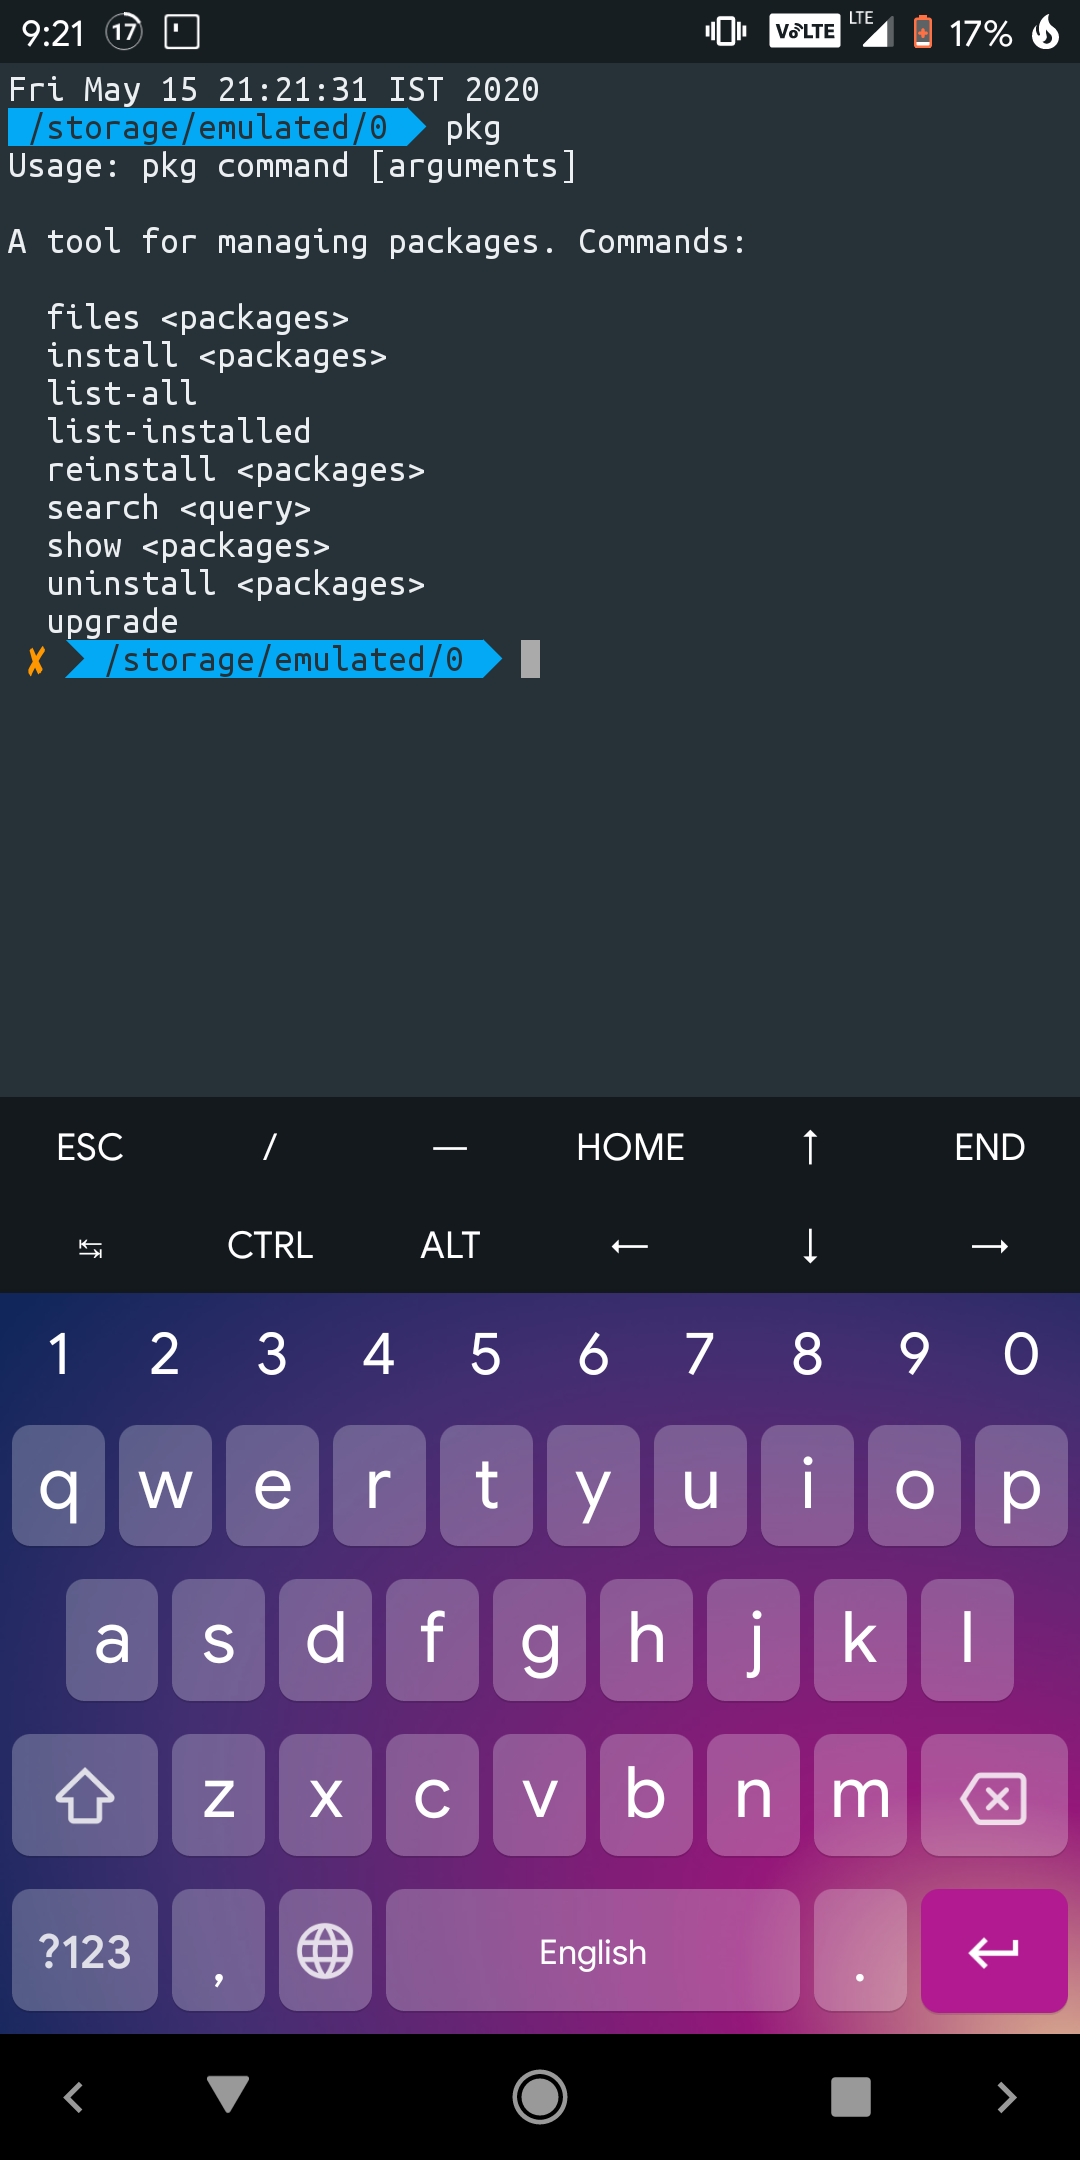
Don’t think something is wrong. This is just there to give you help. So from the output we can see that we have a few commands including pkg install, pkg upgrade, etc., so lets first upgrade the stock packages to latest version by doing pkg upgrade. you will see the repo-data being updated and then you will be asked weather you want to install the packages or not. Typing in y and pressing enter will lead to the package’s installation.
Similarly you can install packages by doing pkg install <package>.
Uninstalling packages works the same way. just do pkg uninstall <package> and it will be uninstalled after a confirmation.
To list all packages available just type pkg list-all/list-installed to get list of all available apckages or installed packages.
Basic Commands for Linux Terminal.
Working on a terminal, you cannot use a GUI(Graphical User Interface) and it is not at all easy to javigate between folders or open files to edit them. Hence, We need a basic understanding of Terminal Commands.
-
- clear
- clears your terminal screen and provides you with a clean terminal window.
- usage
clear - no arguments
-
- cd
- the Change Directory command
- single argument - a path to a directory. not a file.
- usage
cd <relative/absolute path to the file> - usage without an argument leads to changing of working directory to the value of $HOME varible.
-
- pwd
- The Print Working Directory command.
- Prints the absolute path of the current working directory.
-
- ls
- the List command
- used to list all files and folders in the current working directory or the directory provided as argument.
- single or no argument
- usage
ls <relative/absolute path to the directory
-
- mkdir
- command to create a directory
- takes a single argument for the path of directory to be made.
- cannot create a file, for making a file use
touch. - usage
mkdir <relative/absolute path of directory to be made> - directory and folder are terms used interchangeably and often mean the same.
-
- touch
- the command to create an empty file
- takes a single argument for the path of file to be made.
- cannot create directories, for creating directories use
mkdir. - usage
touch <relative/absolute path of file to be made with extension> - remember that it creates empty files and to put data in it we need to use other commands.
-
- exit
- command for exiting a session in Temrux.
- usage
exit - Same functionality can be obtained by pressing
Ctrl+d - thanks for pointing it out @shivamsn97
Permissions for Termux
Just like every other Android app, you need to give termux permissions to storage to access files in internal or external storage. If you wish not to give permissions to storage Termux is Still operable and only works in its own folder in internal memory but these files are inaccessible to the user without termux. Hence, The only sensible step would be to provide it with Storage Permissions. To do so type in the following code in Termux’s Terminal and allow the permission.
termux-setup-storage
Alternatively you can even provide the permissions through the app-info of Termux app. But the method Above will be more easier and will also create some shortcuts for you to navigate easily.
Paths
As we are working on an Android Device the file paths are different. We cannot simply go to internal memory or external memory from your current working directory. This is where you need to have the knowledge of paths of Android file system. To navigate among directories you need to use the cd command.
The root Directory for all Storages is /storage/
Relative and Absolute Paths
So Paths are, as the name suggests, Paths leading to a specific directories or files. There are 2 types of Paths
- Relative
- Absolute
so lets understand this through an example. here we have a tree representation of a python package folder on my internal memory which we will refer to as base for time being.
so the absolute path of the folder here is as shown by the pwd command is /storage/emulated/0/spotidnldr. so from now onwards for this example we will consider /storage/emulated/0/ as base.
Hence the Absolute Path is base/spotidnldr.
$ pwd
/storage/emulated/0/spotidnldr

$ tree
.
├── CODE_OF_CONDUCT.md
├── CONTRIBUTING.md
├── LICENSE
├── README.md
├── cover.jpg
├── gist
├── setup.py
├── spot.py
├── spotidnldr
│   ├── __init__.py
│   ├── clifi.py
│   ├── converter.py
│   ├── cover_download.py
│   ├── downloader.py
│   ├── env_setup.py
│   ├── genius_lyrixer.py
│   ├── spot.py
│   ├── tag_embedder.py
│   └── youtube_search.py
├── termux_setup.sh
└── web.py
now all of the files inside can be accessed by Absolute Paths and Relative Paths.
Absolute Paths are not in any way relative. To access any file in an Absolute manner You will have to type in the whole path of base and then type in the path of the file. Hence to access the spotidnldr folder Absolutely we will need to give full path i.e, /storage/emulated/0/spotidnldr/spotidnldr/
But Relatively this folder is just one level above our current working directory. Relatuvely we use 2 main representations.
-
- .
- a single full stop represents the current folder
- when you do
cd .with “.” as an argument it will lead you to the same folder.
-
- ..
- two full stops without space represent the folder one level back
cd ..with “..” as arguments tocdwill lead to change of working directory to a directory behind your current working directory.
so to navigate to spotidnldr relatively you need to pass./spotidnldras argument tocd. this means change working directory to spotindldr in this current working directory.
Similarly to go back to/storage/emulated/0/spotidnldr/from/storage/emulated/0/spotidnldr/spotidnldrwe can simply docd ..
Path to Internal Memory
Path to Internal Memory is same for every phone.
/storage/emulated/0/
This path leads to the internal memory of of your phone. You can double check it by using the ls command and seeing your internal memory directories and files.
External MemoryCard/microSD
Path to External Storage differs from SD card to SD card. You need to follow some steps to find it.
- Navigate to root of storage directory.
cd /storage/ - Use the
lscommand to find an AlphaNumeric Sequence. That is the path for your external storage. - If you want you can note it or you can follow these steps easily.
- To change your working directory to external storage just type
cd <the AlphaNumeric sequence>
Setup Complete
So We have successfully setup termux for further operations. This is the base system that i use for coding on my phone. And hopefully i have shown you a way to Achieve what you want and i will be doing a followup post for this in a few days regarding how to setup Termux with a text editor for writing code and setting up the Python Interpreter. Until Then 👋.